What is a Form in Microsoft PowerApps?
A form in Microsoft PowerApps is a user interface element designed to collect and manage data from users. Forms allow users to input information, which is then directed to a specified data source for storage or management. Forms play a crucial role in building interactive applications that require real-time data entry and feedback.
Creating a Form in Canvas App
Creating a form within a Canvas app is straightforward. Microsoft PowerApps provides an intuitive design interface where you can drag and drop form controls to create a customized experience.
Steps to Create a Form
- Open PowerApps Studio.
- Select “Create” and choose “Canvas app from blank.”
- Choose your app layout – either phone or tablet.
- On the left panel, click on “Insert,” then select “Forms.” Choose either an Edit Form or a Display Form based on your requirements.
- Set the
DataSourceproperty to the desired data source by using the formula bar, like so:
MyForm.DataSource = SharePointListConnecting to Data Sources
Connecting your form to a data source is pivotal for saving the data input by users. Microsoft PowerApps supports various data sources, including SharePoint, SQL Server, and Common Data Service.
How the Form Can Connect to the Data Sources
To link your form to a data source, you need to establish a connection. This connection allows you to retrieve and submit data effectively.
Steps to Connect a Data Source:
- Go to the “Data” pane in PowerApps.
- Click on “+ Add data” to choose your data source.
- Select the desired data source and connect it to your app.
- Once connected, set the Form’s
DataSourceproperty to refer to your connected data source.
Example
For instance,
Example Code for Connecting to a SharePoint List:
MyForm.DataSource = 'EmployeeList';In this example, replace 'EmployeeList' with the name of your SharePoint list. This ensures that your form pulls data directly from that source.
How to Add Fields to the Form
Adding fields to your form allows you to gather specific information from users. PowerApps makes it simple to incorporate various controls such as text boxes, dropdowns, and more.
Steps to Add Fields:
- Click on the form you have added to your canvas.
- In the right panel, select “Edit fields.”
- Click on “+ Add field” to include new fields from your data source.
After adding, the necessary data cards for each field will automatically display. You can customize these data cards as needed.
Example of Adding a Text Field:
MyForm.Updates.FirstName = TextInputFirstName.Text;This code binds the FirstName field to a text input control, ensuring that whatever users enter will be captured in the data source upon submission.
How to Rearrange Fields in Forms
To optimize user experience, it’s essential to arrange the fields logically. PowerApps provides an easy way to drag and drop fields to your desired locations.
Steps to Rearrange Fields:
- Click on the Data Card you wish to move.
- Drag the Data Card to your preferred position within the form.
- Adjust any layout settings to ensure the form remains visually appealing and user-friendly.
Logical arrangements enhance clarity, ultimately improving how users interact with the form.
Submit Form to the Data Source
Once users fill out the form, it’s vital to submit that data back to your connected data source. PowerApps simplifies this process with the SubmitForm function.
Using the SubmitForm Function
To implement this function, follow these steps:
- Ensure you have a “Submit” button included in your form.
- Set the OnSelect property of the button to call the
SubmitFormfunction.
Example Code:
SubmitForm(MyForm);This code will trigger the form submission process, sending the entered data to the designated data source.
Reset Form
Sometimes, users may need to reset the form to clear previously entered data. Resetting is an important feature to enhance user experience.
Using ResetForm Function
To allow users to reset the form:
- Add a “Reset” button to your form.
- Set the OnSelect property of the button to:
ResetForm(MyForm);Navigate from One Screen to Another Screen
Providing navigation between different screens is essential for complex applications. PowerApps offers the Navigate function for this purpose.
Using the Navigate Function
Follow these steps to implement screen navigation:
- Add a button for navigation.
- Set the OnSelect property to:
Navigate(AnotherScreen, ScreenTransition.Fade);This command will take the user to AnotherScreen with a fade transition effect.
What are Datacards / Fields?
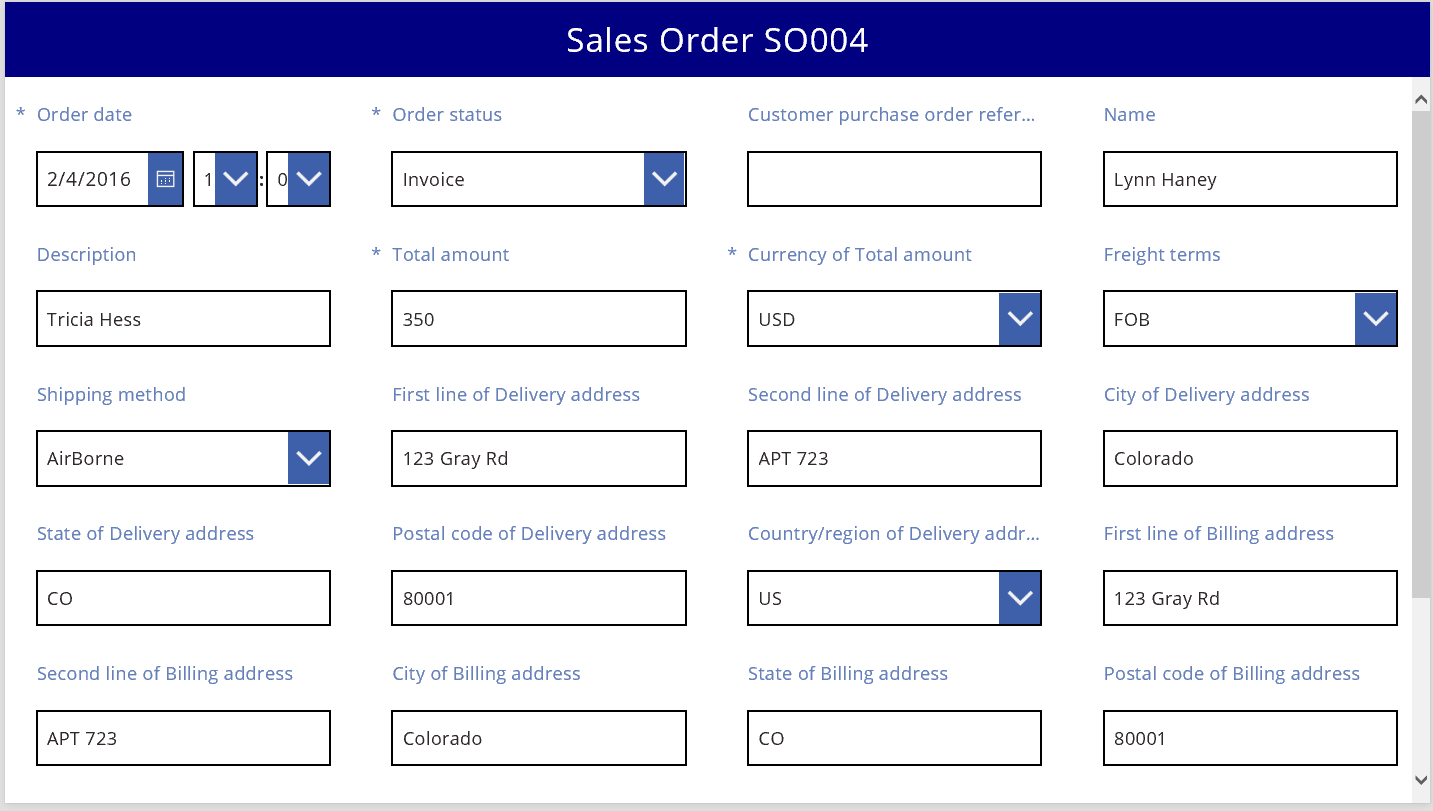
Data cards are integral parts of the form in PowerApps. Each data card corresponds to a field in your data source, encapsulating the necessary controls (like text input or dropdowns) required for user input.
Understanding Key Components of Datacards
-
Visible: This property dictates whether the data card is displayed on the form. You can set it to true or false based on certain conditions.
- Error Message: If the user inputs invalid data, the error message can be displayed to inform them of what went wrong. This enhances user experience by providing immediate feedback.
- DataCard Value: This property signifies the input value that the user provides. It connects the UI to the data source effectively.
- DataCard Key: This is the label that describes what kind of data the card is capturing (e.g., “First Name”, “Email Address”). It helps maintain clarity.
DataCard Properties
Each data card has properties that you can modify to enhance functionality:
- Default: Sets the default value for the data card.
- Required: Defines whether the input is mandatory.
- DisplayMode: Controls whether the user can interact with the field (Editable, View, or Disabled).
Form Properties
The form itself has several critical properties you can manipulate:
- DataSource: Connects the form to its back-end data source.
- Item: Specifies the record currently displayed or edited.
- Mode: Determines if the form is in New, Edit, or View mode based on the user’s actions.
Form Types
Understanding the different form types is fundamental to effectively use PowerApps:
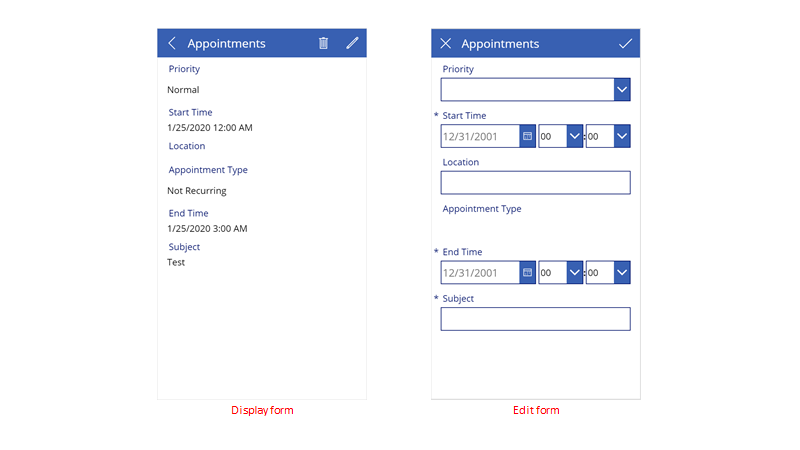
- New Form: Designed for creating new records within a data source.
- Edit Form: Allows users to modify existing records.
- View Form: Displays the data without any changes allowed by the user.
Conclusion
In this Part 1 of our comprehensive guide, we have explored the foundational elements of forms within Microsoft PowerApps. We discussed how to create forms, connect them to data sources, add and rearrange fields, submit data, reset forms, navigate between screens, and understand data cards and their properties.
The robust features of PowerApps allow users to create tailored applications that meet business needs effectively. In the upcoming Part 2 of this guide, we will delve deeper into functions, validations, collections, and advanced form design techniques! Stay tuned!
Further Reading and Resources
For more in-depth knowledge and best practices, you can check out the following resources:
- Official Microsoft PowerApps Forms Documentation
- Getting Started with Common Data Service
- Connecting to Data Sources
Example Images of PowerApps Forms

